A Beginner's Guide to Candle Making
It doesn’t matter whether you were drawn to candle making because you love candles and you want to try your hand at making your own, you’re a crafter looking for a new medium to experiment with or you’re a budding entrepreneur wanting to start a new venture; all newcomers to the candle making space have the same question, “where do I begin?”
Here we will explore just that. We will tell you where we think you should start your journey and all the steps you should follow afterwards to help get you started on a path to success as a new candle maker.
Step One: Pick your wax
Every journey begins with a single step, and the first step you should take on your candle making journey is choosing the main component of your candles, the wax. The wax is what will act as the fuel for your candle.
When deciding the type of wax you will use, consider the following: Are your candles going to be container or mold candles? Do you want to colour your candles? What is most important - scent throw or appearance? Answering these questions will help lead you to the type of wax best suited for your candles.
The different types of wax:
Soy wax is an incredibly popular wax among candle makers these days and is a great wax for beginners to start with. It is made by extracting soybean oil from soybeans and then putting it through a hydrogenation process that changes some of the fatty acids in the oil from unsaturated to saturated. This process allows the oil to remain as a solid when it is at room temperature and drastically increase the melting point. The average soy wax melting point is approximately 124°F.
Due to its low melting point, pure soy wax is best suited for container candles. However, the introduction of new soy wax blends has allowed candle makers to now use it to create many different types of candles including votives and pillars.
While the scent throw of soy wax candles isn’t quite as strong as candles made with paraffin wax, it still offers a decent scent throw when made properly. The fact that it is a more renewable and sustainable wax has made many candle makers overlook this slight downside when selecting this wax for their candles.
Coconut wax is another popular trend in candle making right now. It is made by putting coconut oil through a hydrogenation process that increases its melting point making it better for candle making. It is a very soft and easy to use wax that takes colour well and gives your candles a smooth, creamy finish. It is only suitable for container candles due to its extremely soft consistency. Like soy wax, it’s scent throw doesn’t appear to match paraffin's strong scent throw, but it can still make beautiful smelling candles.
Beeswax is a clean burning wax. It comes in natural yellow or a bleached white colour. You can use it in containers or pour it into molds for freestanding candles. It is an incredibly hard wax in comparison to the soy and coconut wax.
Be careful using metal molds, as it can be a little sticky and hard to get out. Silicone molds are best for making beeswax candles. Most people love beeswax because it provides certain health benefits and its natural honey scent. They usually choose not to add fragrance or dyes that would interfere with these benefits. However, it is possible to add colour and scent beeswax if you want to.
Palm Wax is 100% natural botanical wax made from the tropical palm plant. It requires no additives and can be used in both containers and molds. This wax makes a beautiful sparkle effect in your candles. It is user friendly and releases from your molds easily. It is clean burning and long lasting. This wax will require re-pours in order to achieve the best finish.
Despite the bad rap Paraffin has gained over the years, it still remains the most used wax among candles makers worldwide. It offers excellent scent throw and colour retention which is most likely why it is still so popular. It can be used to make both container and mold candles depending on the type of paraffin you purchase.
IGI 4786 is a 2 pour container wax. It provides the best scent throw and the best colour retention out of all our other waxes. You will need to do a second pour on candles made with this paraffin wax because it will sink considerably around the wick after the first pour.
IGI 4630 is a very soft 1 pour container wax that offers excellent scent throw, glass adhesion and smooth tops.
IGI 6006 is a Paraffin Soy container blend which is also a 1 pour wax that offers excellent scent throw, glass adhesion and smooth tops.
IGI 4625 is a very hard wax meant for freestanding candles like pillars. It comes out of molds easily, takes colour very well and has a great scent throw.
IGI 4794 is a hard wax meant to be used for votive candles. It releases from molds easily and maintains it’s form nicely. Candles need to be burned in a proper votive candle hold
Each type of wax will come with a set of instructions that will tell you the best temperatures to melt to, add fragrance and pour. For more information on melting your wax, read our blog on “How to Melt Wax for Candle Making.”
Step 2: Choose your vessels or candle molds
Once you have figured out the type of wax that you would like to work with, you will need to find appropriate containers or candle molds to use with it. I recommend reading our recent blog “What type of jars are best for candles” when you are selecting vessels to use for your candles. You want to make sure that it is a container that is heat resistant so that the candles that you make are safe to burn.
If you are planning to make free standing candles, you will want to ensure that the molds you select work well with the wax you have selected. For example, if I wanted to use beeswax for my candles, it would not be a good idea to select a metal mold, especially if it has many pointy corners because it would be incredibly difficult to remove your candle from the mold. If you are just using a round mold, you may be able to get away with it, but silicone molds work best with beeswax.
Step 3: Wick it
Now that you have selected your wax and your container or mold, you will need to use them to help you choose the wick that will work best in your candles. First, you will need to find wicks that are known to work well in the wax that you have chosen. For example, wicks that are made with a zinc core work well in paraffin candles, but they would drown if put into a soy wax candle.
Then you will need to measure the diameter of your container or mold. This is the distance from one point on your container or mold through the center to another point on the container or mold. This measurement is the most important measurement you need to know in candle making as it is needed for selecting the right sized wick.
Often beginners think that how many ounces of wax they are using, or the height of the container is what is needed when selecting the wick, but the diameter is far more important. For example, if my candle jar is 3” in diameter and I put a wick that can create enough heat to make a 4” around melt pool, the excess heat could cause the jar to shatter at the very least causing a big mess and at worst starting a fire. When buying wicks, make sure that the type of wax it is meant for and the diameter of the candle it is meant for is listed in the description. If they aren’t, don’t buy them!
Most pre-tabbed candle wicks are around 6” tall, so the only time that the height of your candle will matter for selecting a wick is if they will be taller than that. In this case, you would need to look into buying a spooled wick and tabs to make custom wicks.
For more help with selecting the best wick for you, read our blog “What are the Different Types of Candle Wicks?”
Step 4: To scent and colour or not
Now that you’ve decided the basics for your candles, it’s time to start thinking about the fun stuff. If you are planning to add scent and/or colour to your candles, you want to make sure that you select fragrances and dyes that are oil based. Wax is oil based and therefore will not blend with water or alcohol base fragrances.
Despite what those YouTube videos told you, crayons, food colouring and mica should not be used to colour your candles. While crayons are made of wax and therefore oil based, they use a pigment that will clog your wick and stop it from burning. Food colouring is a water-based product, and you know what they say about oil and water, they don’t mix. Finally, mica is crushed stone particles that will clog the wick just like the crayon pigment. They get drawn into the wick with the wax and get stuck, stopping the wax from flowing freely up to the flame to provide fuel. This will eventually cause your candle to go out and will ruin your candle. Proper candle dye generally comes in either chips or liquid form.
There are literally hundreds of thousands of fragrance oils to choose from. They range from essential oils that are derived directly from the plant that is listed on the bottle, to synthetic scents that cover just about every smell known to man.
Not every scent will work the same in every type of wax, so you will need to do some testing to find the scents that you like the best. As you become more comfortable with the scents, blending oils to create custom scents can be a lot of fun too!
For more information on choosing scents, read our blog “How to Choose Scents for a Successful Candle Collection” as well as “How to make candles with essential oils.”
Step 5: How much will I need?
After you have determined what you want to buy, you will likely find yourself wondering how much of each item will you need. For this, you will need to do a little basic math to figure out. I would start by deciding how many candles you would like to make. This number will tell you how many containers you need and how many wicks you will need.
Then you will need to figure out how much wax will be needed to fill 1 container and then multiply that by the number of containers you plan to fill. If, for example, my jars held 8oz of wax and I wanted to make 12 of them, I would need 96oz of wax in total. It is common knowledge that 1 pound of wax will melt down into approximately 20oz of liquid wax. Therefore, I would divide 96oz by 20oz to find out how many pounds of wax to buy for my project (4.8lbs).
Now that I know how many jars, wicks, and pounds of wax to buy, I will need to figure out how much scent to buy. Generally, you will want to put between 30-50ml of fragrance oil in every 1lb of wax to get the best scent throw from your candle. Going back to my example above, that means that I would need 144-240ml of fragrance oil to fully scent all my candles.
For dying your candles, you will need to look at the recommended amount per pound to determine how much dye you will need to complete your project.
Step 6: What supplies will I need?
Aside from the wax, vessels and wicks, there are other supplies that you will want to use for your candle making as well. Here is a list of items that will come in handy:
- A way to melt your wax (ie double boiler, microwave, presto pot).
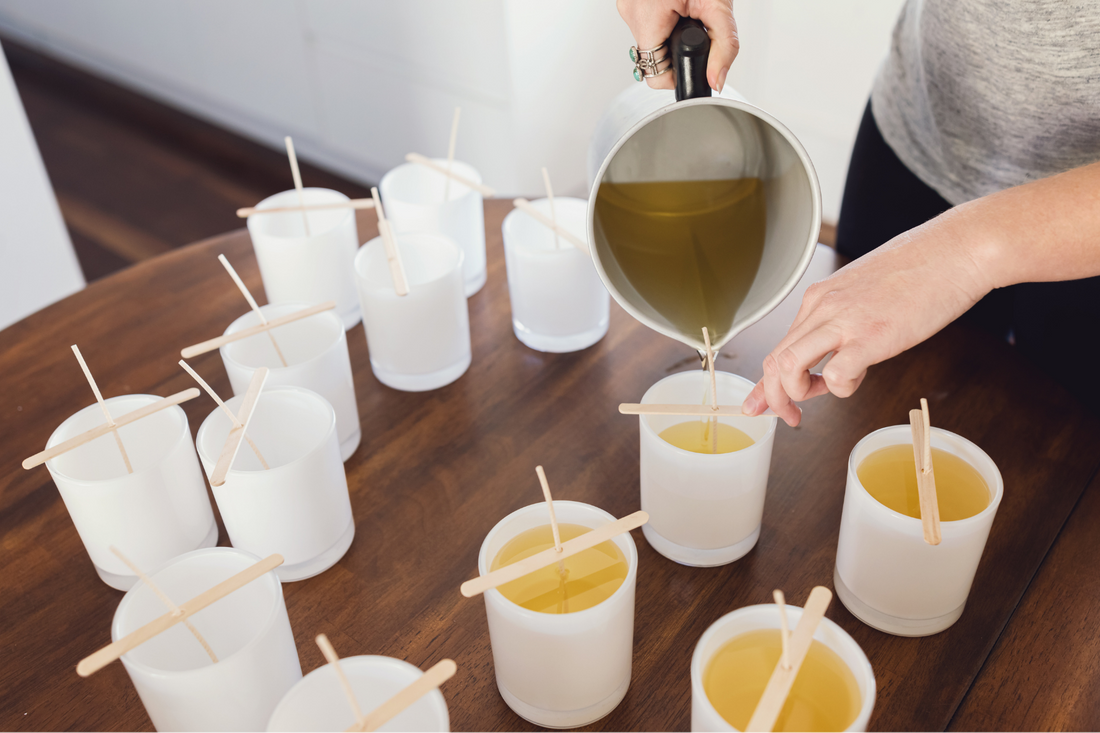
- A pour pot that will be used for mixing your fragrance and/or dye into your wax and for pouring the wax into your containers/molds.
- Wick stickums. These little stickers will hold the base of your wick tab to the center of your vessel and will ensure that the wick doesn’t float to the edge of your candle causing damage to the container.
- Heat resistant measuring cups. You will need these to make sure that you are adding the proper amount of wax and fragrance oil to your candle recipe.
- Caution labels if you are planning to sell or give away your candles. These tell the recipient how to burn the candle properly and safely.
- Wick straightening tool. This will keep your wick standing straight up the middle of your candle while it is setting.
- Heat gun or hair dryer. These come in handy during clean up. The best way to clean up a waxy mess is by heating it into liquid form and wiping it up with paper towels. They are also useful for smoothing out the tops of your candles.
Step 7: Have fun!
These may seem like a lot of complicated steps, but once you get started you will see that they really aren’t that complicated at all. While candle making is science, it’s not rocket science, so I assure you that only a small amount of trial and error will be needed in getting you started on your candle making journey.
Have some fun with it and don’t be afraid to test out different things. If you find yourself stuck, ask other candle makers for help. There are some great online forums where the more experienced members of the candle making community come together to offer valuable advice to each other as well as newbies. You can also reach out to your supplier for advice on using their products. Most will have experts on staff that can help you trouble shoot and walk you through how to get the best results from their supplies.
Happy candle making!


