Craft Your Own Soy Candle in 5 Easy Steps
Welcome to Village's beginner-friendly guide on crafting your very own soy candles! In this step-by-step article, we'll walk you through the process of creating beautiful and fragrant candles right in the comfort of your own home. With just a few materials and some creativity, you'll be able to enjoy the cosy ambiance and delightful scents of homemade soy candles. Let's dive in!
Step 1: Gather Your Materials
Before you start, make sure you have all the materials you need.
Here's a handy checklist:
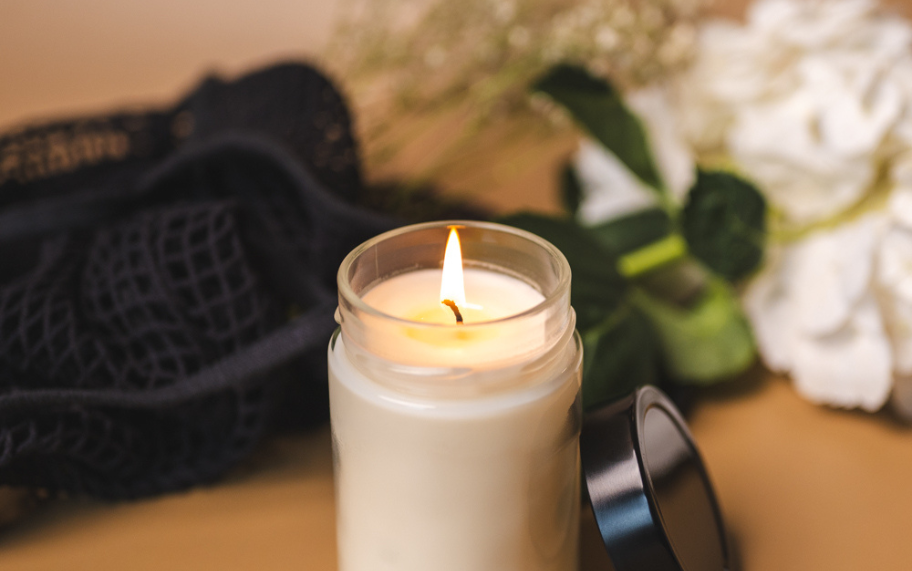
- Soy wax (such as NatureWax® C-3 Soy Flakes)
- Containers (preferably six-ounce mason jars for this project)
- Wicks (HTP105 wicks for a two and a half to three-inch candle diameter)
- Wick Stickum
- Fragrance oils (Seaside Solitude is our delightful choice in this blog)
- Liquid dye (turquoise liquid dye for a soft, pastel hue)
- Other candle-making tools as desired
Take a moment to collect everything you need to ensure a smooth and enjoyable candle-making experience.
Step 2: Melt, Scent, and Dye the Wax
Once you have your materials ready, it's time to melt the wax. Choose the type of wax that suits your preferences and the type of candle you want to make. Soy wax, coconut wax, paraffin wax, and beeswax are popular options. For our candle-making journey, we'll be using NatureWax® C-3 Soy Flakes, a fantastic soy wax blend known for its great scent throw and ability to hold colour.
Heat the wax using a double boiler, microwave, or wax melter, following the manufacturer's instructions. Maintain the recommended temperature range, typically between 160 and 200 degrees Fahrenheit for NatureWax® C-3 Soy Flakes. Once the wax is melted, it's time to add fragrance oil and dye. For a one-pound wax batch, a maximum fragrance load of six percent is recommended. Add approximately one ounce of fragrance oil and the desired amount of dye. Stir slowly and thoroughly to achieve an even distribution.
Step 3: Prepare Container and Wick
Now that your wax is scented and dyed, it's essential to prepare your container and wick. Choose a suitable container for your candle, such as a mason jar or any other heat-resistant vessel. Ensure the container is clean and dry before proceeding.
Next, select the appropriate wick based on the diameter of your container. The wick plays a crucial role in proper burning and scent distribution. For instance, if your container has a bottom diameter of about 2.7 inches, an HTP 105 wick would be suitable. Secure the wick base to the centre of the bottom of the container using a wick stickum and then use a wick-centring tool to keep the wick upright and centred throughout the candle-making process.
Step 4: Pour Wax
With the container and wick prepared, it's time to pour the melted wax into the container. Take care during this step to avoid spills and ensure a clean pour. As you pour, observe the beautiful soft colour created by the soy wax and dye combination. Once the container is filled, allow the wax to cool and set slowly. This process helps in achieving a smooth and even finish.
Step 5: Trim the Wick, Cure, and Enjoy
After patiently waiting for the wax to set, it's time to add the finishing touches to your candle. Remove the wick centering tool and trim the wick to a quarter of an inch using toenail clippers or specialised wick trimmers. This length ensures optimal burning and minimises smoke.
To achieve the best results, it's recommended to let your candle cure for up to two weeks. This curing period allows the fragrance to fully develop, enhancing the overall scent experience. Once the curing period is over, light up your homemade soy candle, sit back, and relish the soothing ambiance and enchanting fragrance it brings to your space.
Types of Wax
There are several types of wax available, including soy wax, coconut wax, paraffin wax, and beeswax. When selecting a wax, consider the type of candle you want to make, as well as the scent and colour you want to achieve. For this tutorial, we used NatureWax® C-3 Soy Flakes, a soy wax blend that provides a great scent throw and colour.
Tip: Here’s A Comprehensive Guide to Village Craft & Candle's Soy Waxes for Containers and Melts [DIY Soy Wax Melts]
Conclusion
Making your own soy candle is a fun and rewarding experience that anyone can do. By following these five easy steps, you can customise your own candle and enjoy the sweet aroma of your favourite fragrance. Not only is it a fun activity to do by yourself, but it also makes for a great gift for family and friends. So go ahead, get creative, and light up your space with the warmth and glow of your own homemade soy candle!


