Candle Moulds - A Complete Guide
Trends in candle making are constantly changing and evolving, with tried-and-true methods being brought back into use combined with new techniques and styles. Moulded candles have been around for centuries, but renewed interest has made them the newest candle craze. Makers are finding innovative and exciting ways to put a modern twist on these classic candles. You can find almost anything on the market these days from bubble candles to body moulds and everything in between.
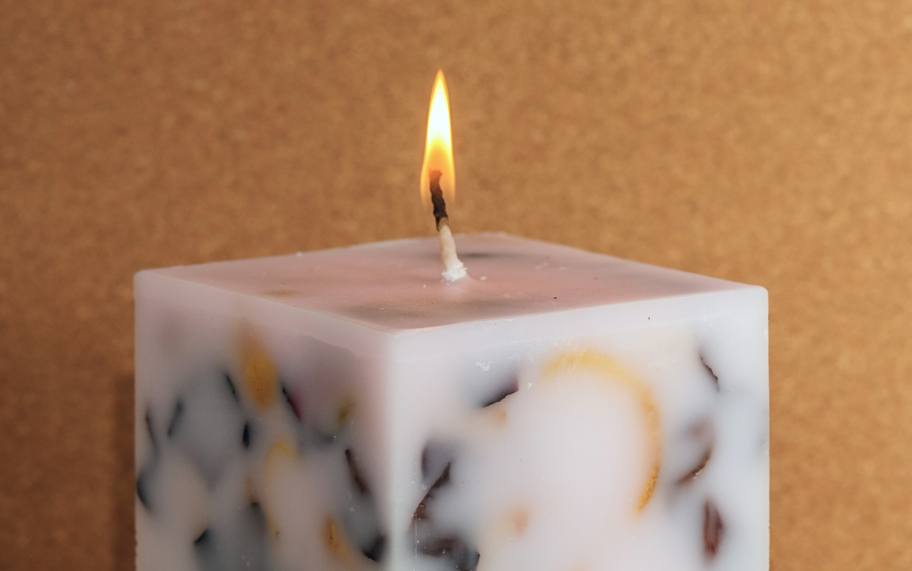
A mould candle is any candle that is made by pouring wax into a form, allowing it to set and then removing it from the form before lighting. There are 3 crucial aspects that you will need to consider when making a free-standing candle. The first is the wax, the second is the mould and finally the last thing you will need to consider is the wick.
There are lots of great reasons for adding moulded candles to your collection. They allow you to expand your line into many different shapes and sizes that aren’t possible when making jar candles. Another reason why you may want to consider making moulded candles is because the cost of jars has been increasing while the reliability of supply has been decreasing.
Free-standing candles do come with the initial expense of your mould(s) which can be quite expensive especially depending on the type. However, after this investment you will be able to use that mould countless times before it will need to be replaced if you invest in good quality moulds and take care of them properly.
Here we will explore how to get started on your journey to create beautiful free-standing candles. We will cover the types of wax you can use and 2 popular kinds of moulds. We will also explain how to make a mould candle and how best to care for your moulds.
What Wax to Use for Moulded Candles?
Since a free-standing candle will not have the walls of a container holding it in place, you will need to select an extremely hard wax that will be able to hold its form while it is being burned. There are a variety of different waxes that can be used for moulded candles, including paraffin, beeswax, palm wax and soy wax. You want to make sure to find a wax that has a minimum melting point of around 140°F.
Harder waxes can handle heat better than softer waxes that are meant for containers. There are several reasons why you don’t want to use wax that is meant for a container when making a free-standing candle. First, extremely soft waxes like some soy waxes and coconut wax will be next to impossible to get out of your mould. If you are lucky enough to get a candle made with container wax out of your mould, there is a good chance that the unmolding process has left any fine details still in the mould. Finally, if you managed to get your candle out of the mould all in one piece, whoever burns your candle will need to be prepared to clean up a terrible mess when it melts into a huge oily puddle.
When you select a wax that is specifically meant for mould candles, you can rest assured that when paired with the proper mould and wick your candle will come out beautifully and will hold its form to the last burn.
How to Select the Right Mould?
Once you have selected the wax you would like to work with, then you will need to select a mould. Here we will look at the 2 most popular types of candle moulds: metal and silicone.
Metal moulds are a great option if you are planning on making candles that are basic shapes with smooth sides. They are very durable and hold up well when using high melting point waxes. In comparison to silicone moulds, metal moulds are relatively inexpensive. When taken care of properly, metal moulds have a very long lifespan. Some vintage metal candle moulds have even grown in value and are sought after by collectors.
Some disadvantages of using metal moulds include the fact that only simply shaped candles with no interesting details can be made with them. Another major disadvantage is that they are not ideal moulds for making beeswax candles due to the stickiness of the wax making it difficult to get them out of the moulds.
Silicone moulds are excellent for making candles in a variety of shapes with intricate details. The advantages of using silicone moulds are plentiful which is why many professionals use them to make their candles.
Benefits of Using Silicone Moulds
- When made with high quality materials, silicone moulds are essentially indestructible and can endure many years of professional candle making use.
- It can withstand having wax over 200°F poured into it.
- Mould release is not necessary as most waxes won’t stick to silicone.
- The shapes that can be made and the number of details that can be added to candles made with silicone moulds are virtually limitless.
The main disadvantage is how costly they are to purchase, but over several years of use they will see that they are worth the hefty price. You will also want to make sure that you are purchasing a high-quality silicone mould with high tensile strength. Beware of cheap silicone moulds as they are made from low tensile silicone that will rip and break easily and need to be replaced after very little use. Cheaper silicone moulds will also absorb colour and scent which can be transferred from candle to candle.
Choosing the Right Wick for a Mould Candle
Selecting the best wick for your free-standing candle is much like choosing a wick for a container candle. Begin by looking for a wick that is best suited for the type of wax you will be working with. Then you will need to know the diameter (width) of your candle to pick the correct sized wick.
A wick that works well in a container candle most likely won’t be the best fit for a free-standing candle of the same diameter. This is because the wax is so much harder and has a higher melting point. A free-standing candle will require more heat to create the same sized melt pool as a container candle of the same width.
You will need to be exceptionally careful to select the right size wick for your mould candle. Ideally, the candle will burn slowly and completely into itself. If you over-wick your candle, the excess heat will cause the melt pool to break through the wax walls of the candle causing melted wax to flow down the side. If you under-wick the candle, it will tunnel down the middle and will likely drown due to wax from the sides melting down on top of the flame and putting it out. As with all candles, test burning from start to finish is of the utmost importance to ensure you have selected the right wick for your candle.
How to Make a Mould Candle
Now that you know what materials you are going to be using, let’s look at how to make a free-standing candle using both a metal mould and a silicone mould. Keep in mind that there are several different ways to make a mould candle and we are just covering our favourite methods for each type of mould. As a candle maker it is important that you find the method that works best for you.
In a Metal Mould
Begin by making sure that your mould is clean and dry. Then you will need to add your wick by sliding it through the predrilled hole in the bottom of the mould. Tie the wick in a slip knot leaving a few inches of wick at the end. Take some mould sealer and seal the hole around the wick. Gently pull the wick up from the top of the mould so the knot and the sealer fully cover the hole. As extra precaution, we recommend covering the knot and the sealer with a piece of duct tape and placing the mould on a tray to further protect against any leakage. Next secure the wick to a wick bar or wick centering tool to keep the wick stretched tight and straight.
Once your mould is prepared, you will melt your wax to the recommended temperature, remove it from the heat, add your fragrance oil and/or dye, and gently stir to combine. Allow the wax to cool to your preferred pouring temperature. Pouring the wax at hotter temperatures will create a shiny smooth finish, while pouring at cooler temperatures will result in a matte, rustic finish.
Slowly pour the wax into the centre of the mould being careful not to splash the sides with wax. Leave around 3-4 ounces of wax in your pour pot to do a second pour later. As the wax begins to harden, poke relief holes around the wick with a skewer to help prevent air pockets from forming.
After the candle is almost completely set but has not yet shrunk away from the sides of the mould, reheat the wax that you saved from the first pour. To help avoid a noticeable line between the first and second pours, you should heat the wax to 10°F hotter than the pouring temperature of your first pour. Pour the remaining wax into the mould and allow it to cool overnight.
When it is fully set, remove the mould sealer, and untie the knot. Turn the mould upside down and gently remove the candle. If you are unable to get the candle up, lightly squeeze the sides to release any areas that may be stuck to the mould. You could also put the mould in the refrigerator (not the freezer) for a few minutes. The cold will help to shrink and harden the wax further making it easier to remove.
The part of the candle that was at the bottom of the mould will be the top of your candle. Trim the wick at the bottom so that it is flush with the bottom of the candle. Trim the wick at the top of the candle so that it is ¼” long. Now your candle is complete, and ready to enjoy!
In a Silicone Mould
Making a candle in a silicone mould is slightly different from making a candle in a metal mould. I prefer to use a wick pin when using a silicone mould, but you could also thread a wick up through the bottom of your mould and secure the wick to a wick bar in the same way we recommended with the metal mould.
Begin by pushing the wick pin into the centre of the bottom of the silicone mould and placing the mould on a tray in case of any leakage. Heat your wax to the recommended temperature before removing from the heat source and gently stirring fragrance and dye if desired.
Allow the wax to cool to the chosen pour temperature and then slowly and carefully pour the wax into the mould. As mentioned before, pouring at hotter temperatures will give you a smooth shiny finish and pouring at cooler temperatures will result in a more matte rough finish. When the wax has set but remains warm and pliable remove the wick pin (around 2-3 hours after pour depending on the size of the candle). If you pull the pin too soon, the hole will collapse. If you pull the pin too late, it will be very difficult to remove from the wax.
After the candle has completely cooled, carefully remove the candle from the silicone mould. You will need to be extra careful if the candle has many intricate details, so they don’t break off during the unmolding process. Slide a pre-waxed, pre-tabbed wick up through the bottom of the candle. Reheat the bottom of the candle to seal in the wick and flatten the base of the candle. Light and enjoy!
Caring for Your Mould
Candle moulds can be very expensive, so it’s important that you take care of them to get as much use out of them as possible. Both metal and high-quality silicone moulds are very durable, so that makes them easy to maintain.
For metal moulds it’s best to avoid using water to clean them as it can cause them to rust. Use heat from a heat gun or hair dryer to re-melt any wax that is stuck to the moulds and then wipe it out with a paper towel being careful not to burn your hand. Try not to concentrate a lot of heat where the metal is welded as this can weaken the weld. Store the mould in a dry place as humidity can cause the mould to corrode.
Silicone rubber moulds develop a thin glaze of wax after repeated uses. To remove a light glaze, you can just brush with a bottle brush, or for a heavy wax glaze run through the dishwasher or boil in a pot of water and then wipe with a soft cloth. Store your mould standing up right and cover with something like a paper towel to keep the dust and dirt out of it.
Conclusion
Learning to make free-standing moulded candles is a fun way to expand your candle making experience. It will allow you to add interesting new shapes that may not have been possible for container candles. While they can be slightly more difficult to make and moulds can be somewhat expensive, the rewards will far outweigh the challenges once you get going with them. Be sure to find good quality moulds so that you will get plenty of use out of them and take care of them properly to extend their life as long as possible. Happy Candle Making!


