How to Make Reed Diffusers in 4 Easy Steps - Tutorial

If you're someone who loves a beautifully fragrant home but prefers a flame-free solution, making your own reed diffuser is the perfect craft for you. Not only is it simple, but with our guide, you can customize your diffuser to fit any decor and season.
In this blog, I'll walk you through the steps to create a stunning, effective diffuser using specially selected bottles that elevate your space’s aesthetic.
Why Make Your Own Diffuser?
Commercial air fresheners often contain harsh chemicals that can be detrimental to your health. By making your own diffuser, you control the ingredients and avoid unwanted additives. Plus, the customization possibilities are endless—not just in scent, but in the design of the container itself, allowing you to match your décor perfectly for a seamless aesthetic in your home or office.
Materials Needed
1. Glass Containers

Choose any glass container, but those with a narrow neck are best to slow evaporation.
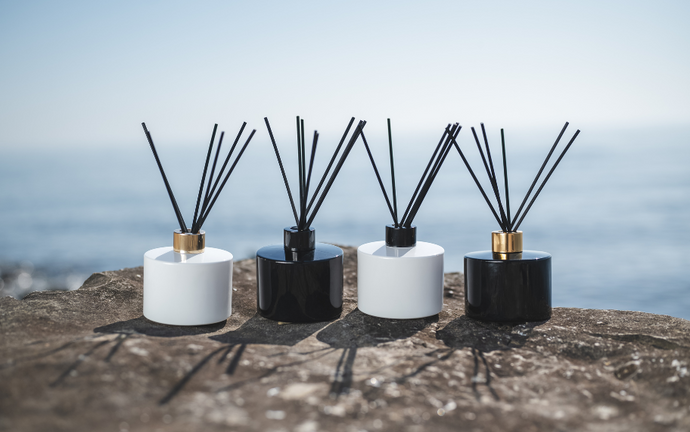
Tip: Our new line launching in June includes options like the Rounded White Glass with a Gold or Black Cap, Rounded Black Glass with a Black Cap, and a Beaker-Style Glass—all ideal for a chic look.
2. Cotton Reed Diffuser Sticks

Why Cotton? Cotton reeds provide excellent absorption and fragrance dispersion compared to traditional rattan sticks.
3. All-Natural Reed Diffuser Base
Opt for an all-natural reed diffuser base for a safe and environmentally friendly option. Our all-natural base ensures your diffuser is free from harmful chemicals.
4. Fragrance Oils

Start with a single fragrance oil for simplicity or create a unique blend tailored to your preferences or the season.
Equipment
- Measuring cup
- Digital kitchen scale
- Stir stick
Step-by-Step Guide to Creating Your Diffuser
1. Prepare Your Mixture:
-
Using the digital scale, measure 5 oz of the all-natural reed diffuser base into your measuring cup.

-
Add 2 oz of your chosen fragrance oil(s) to the base. The ideal ratio for optimal scent throw is 40% fragrance to 60% base.

2. Mix Well:
-
Stir the mixture thoroughly for about 20 seconds to ensure the fragrance oil is well combined with the base.
3. Assemble the Diffuser:
-
Carefully pour the liquid mixture into your chosen glass container. The elegance of the container adds a decorative touch while serving its purpose.

-
Add 10 to 15 cotton reed diffuser sticks to the container. Starting with 10 ensures adequate throw and absorption.

4. Activate the Diffuser:
-
Allow the reeds to sit for 24 hours, then flip them over to start the scent distribution. This process helps the fragrance fully soak into the reeds.

Maintenance Tips
- Refresh Your Scent: Flip the reeds every week to refresh the scent. This helps maintain a consistent fragrance level.
- Reed Replacement: Once the reeds are fully saturated and can no longer absorb the fragrance, replace them with new ones to keep the scent fresh.
Seasonal Scent Inspirations
1. Spring and Summer Blends

-
Ocean Breeze: Mix "Amber and Driftwood" with "Sea Moss" for a fresh, oceanic scent.
-
Tropical Retreat: Combine "Fei Banana and Ginger Lily" with "Tropical Chai" for a lush, exotic aroma.
2. Fall Blends

-
Autumn Warmth: Blend "Apple Orchard" and "Spiced Pumpkin Pie" for a cozy, inviting fragrance.
-
Woodland Stroll: Mix "Autumn Trail" with "Crackling Birch" to capture the essence of a crisp fall walk.
3. Winter Blends

-
Holiday Spirit: Combine "Eggnog" and "Spiced Pumpkin Pie" for a festive, comforting scent.
-
Winter Forest: Mix "Alpine Getaway" with "White Moss and Balsam" for a fresh, invigorating aroma reminiscent of a snowy forest.
These blends will help create the perfect ambiance, enhancing your living spaces with the unique aromas of each season.
Final Thoughts
Creating your own reed diffuser is a delightful way to personalize your space, offering both aesthetic beauty and a pleasing aroma tailored to your taste. With the right materials and a bit of creativity, you can transform your environment into a sanctuary of scents that not only smell good but look remarkably chic.
Remember, the key to a successful DIY diffuser lies in the quality of the materials, especially the choice of container and fragrance blend.

We'd Love to See Your Creations!
Have you tried making your own reed diffuser using our guide? We're excited to see how you've customized your diffusers to match your style and scent preferences! Share your creations with us on social media using the hashtag #MyDIYDiffuser and tag us so we can feature some of our favorites on our profiles.
Your unique designs not only inspire us but help others get creative with their home fragrances too.
Stay tuned for more creative ideas and be sure to check out our upcoming line of elegantly designed bottles that will make your next project not just fragrant but visually stunning.
Happy diffusing!


